
Explore Products
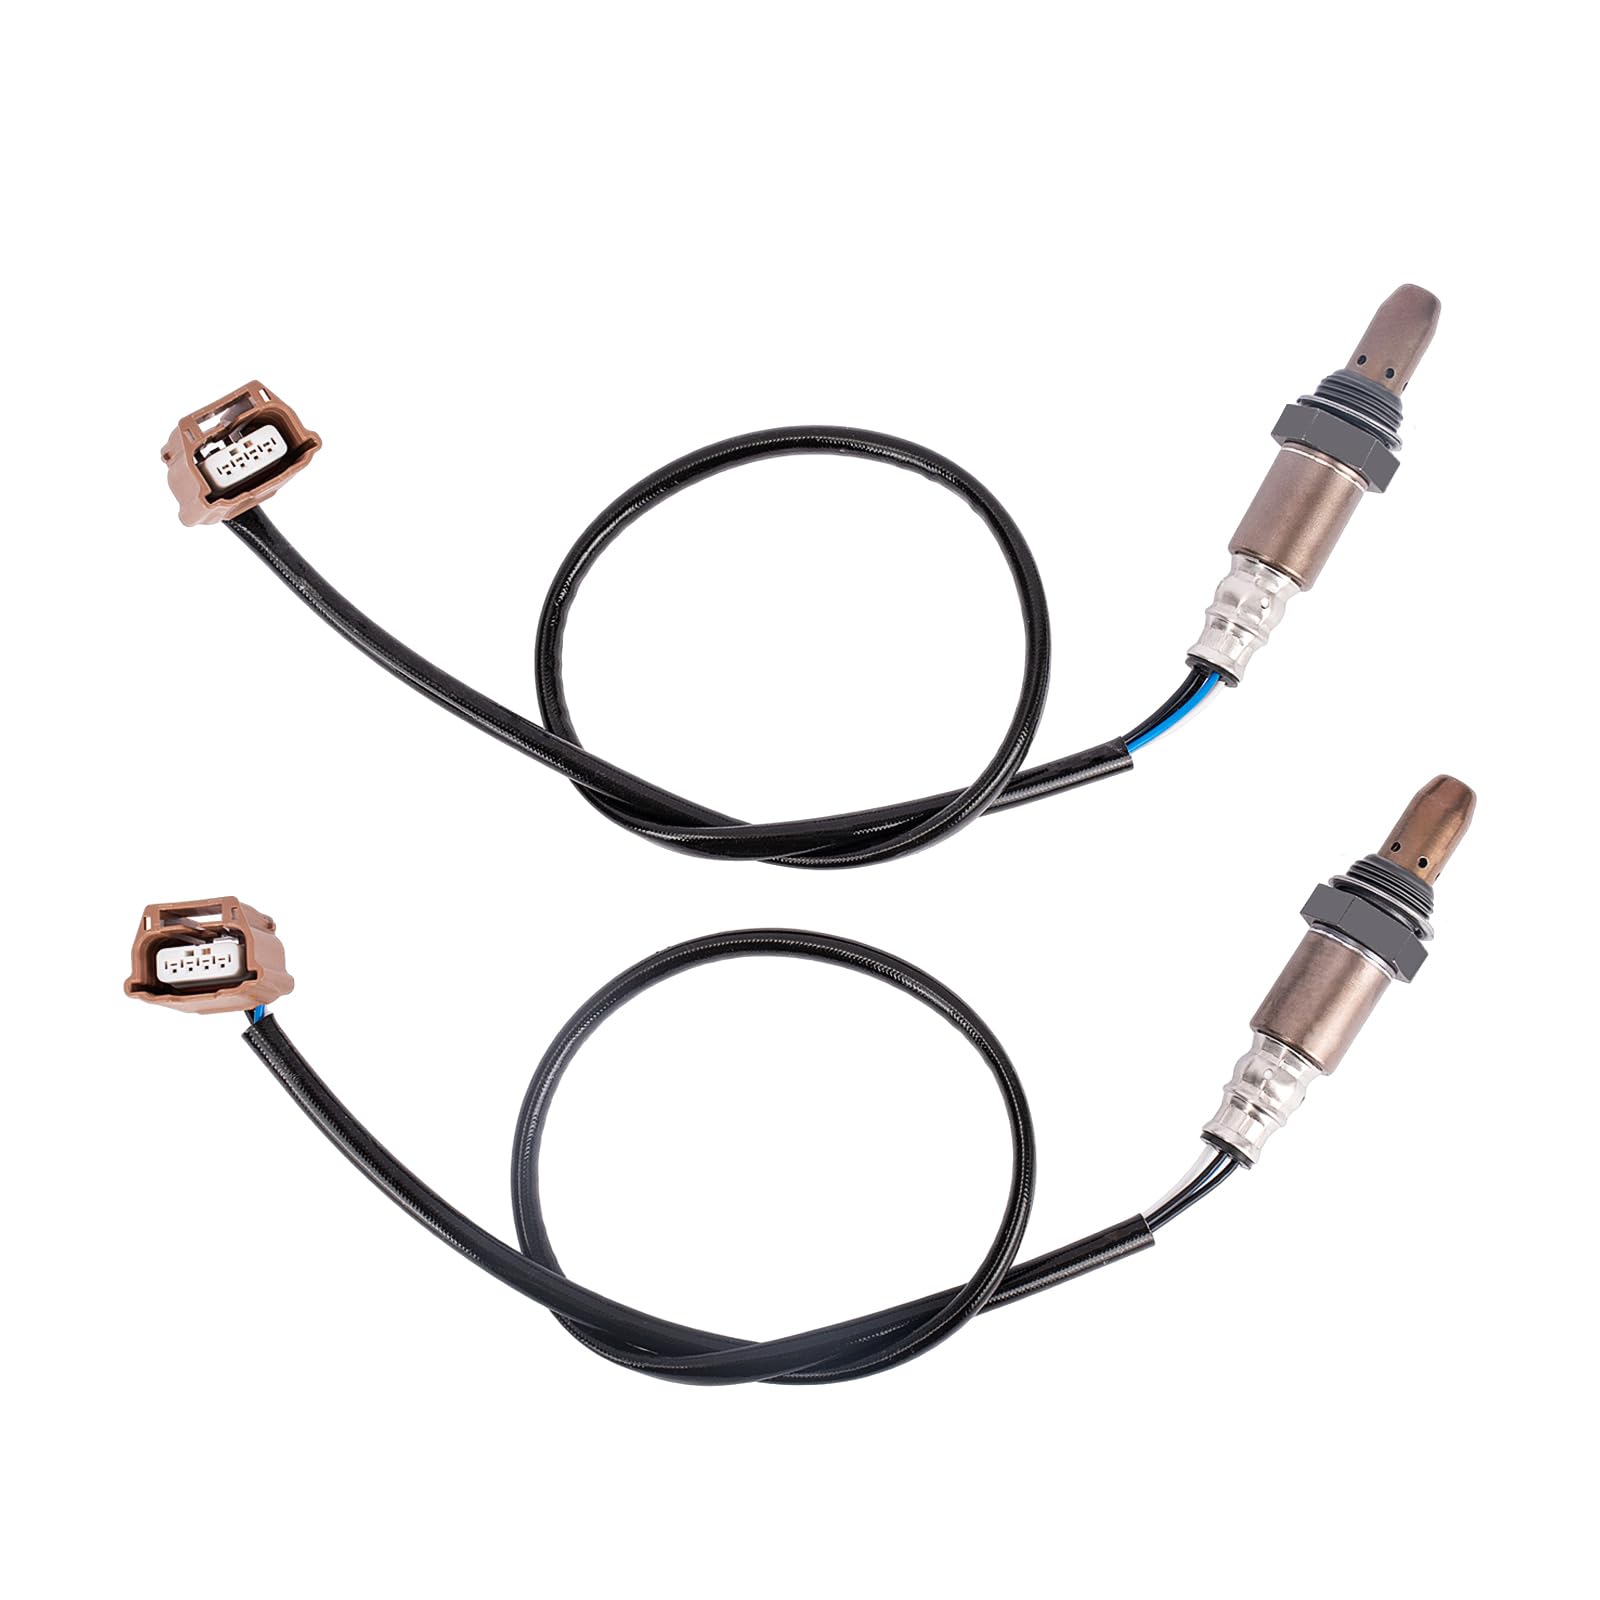
Yeoflagtrade 234-9135 Oxygen Sensor Upstream O2 Sensor for 2013-2014 Nissan Altima Frontier Xterra 2011-2013 Nissan Quest/Infiniti 2011-2013 G37 M37 22693-1JA0A 22693-1MR0A
Yeoflagtrade 234-9135 Oxygen Sensor Upstream O2 Sensor for 2013-2014 Nissan Altima Frontier Xterra 2011-2013 Nissan Quest/Infiniti 2011-2013 G37 M37 22693-1JA0A 22693-1MR0A
Item Details
Pickup Location
7440 Dean Martin Dr Suite 204
Las Vegas, NV, 89139
Quality
New
Functional
No Damage
No Assembly Needed
In Package
No Missing Parts
Auction closes
September 21, 2025 at 1:53 AM
brand
YeoflagtradeEstimated Retail Price
$58.59
size
234-9135weight
0.44 lbsBuyers Premium
15%
Inventory Number
1051228011
Found in
Features
- Compatibility: 234-9135 O2 Sensor Compatible With Infiniti 13 EX37, FX37, 13 FX50, 13 JX35, 11-12 EX35, FX35, 12-13 M35h, 11-13 G37, M37, 14 Q60, QX50, QX70, 14 QX60, 14 QX70; for Nissan 14-15 Armada, 14 Quest, Maxima, 11-14 370Z, 11-14 Murano, 12-14 NV1500, NV2500, NV3500, 12-13 NV3500, 11-13 Quest, 13-15 NV0, 13-15 Sentra, 13-15 Titan, 13-14 Altima, Pathfinder, 13-14 Frontier, Xterra
- Replace OE: 234-9135 22693-1MR0A 22693-3RC0A 22693-3WY0A 22693-1JA0A 211500-7630 2115007630 226931JA0A. Note: For more details, please select your vehicles to check.
- About the O2 Sensor: The part of the heating head of the plugs is well designed to replace your needs, no extra work is required to reset or adjust when you use it.
- How to Choose: Please check the description or use the year/make/model drop-down bar and interchangeable part numbers to confirm the compatibility.
- How to Replace: Step 1. Locate the oxygen sensor position and remove it with a socket, step 2. Compare the new sensor to the old sensor to ensure a proper installation, step3. Please clean the threaded port to ensure a proper seal of the new sensor, step 4. Gently tighten the sensor in order to keep the wire free from damage and avoid sensor leakage, step 5, reinstall the connector, and try to clear it if the car has diagnostic trouble codes.
Online Reviews
3.9/5
Based on 2 ratings
This score is based on 2 recent reviews from online retailers.
Be sure to check our Quality Rating and Notes above for more details on this listing.


Getting Started
Learn more about bidding, winning, pickup, and more on our video tutorials page.
Visit Video Tutorials