
Explore Products
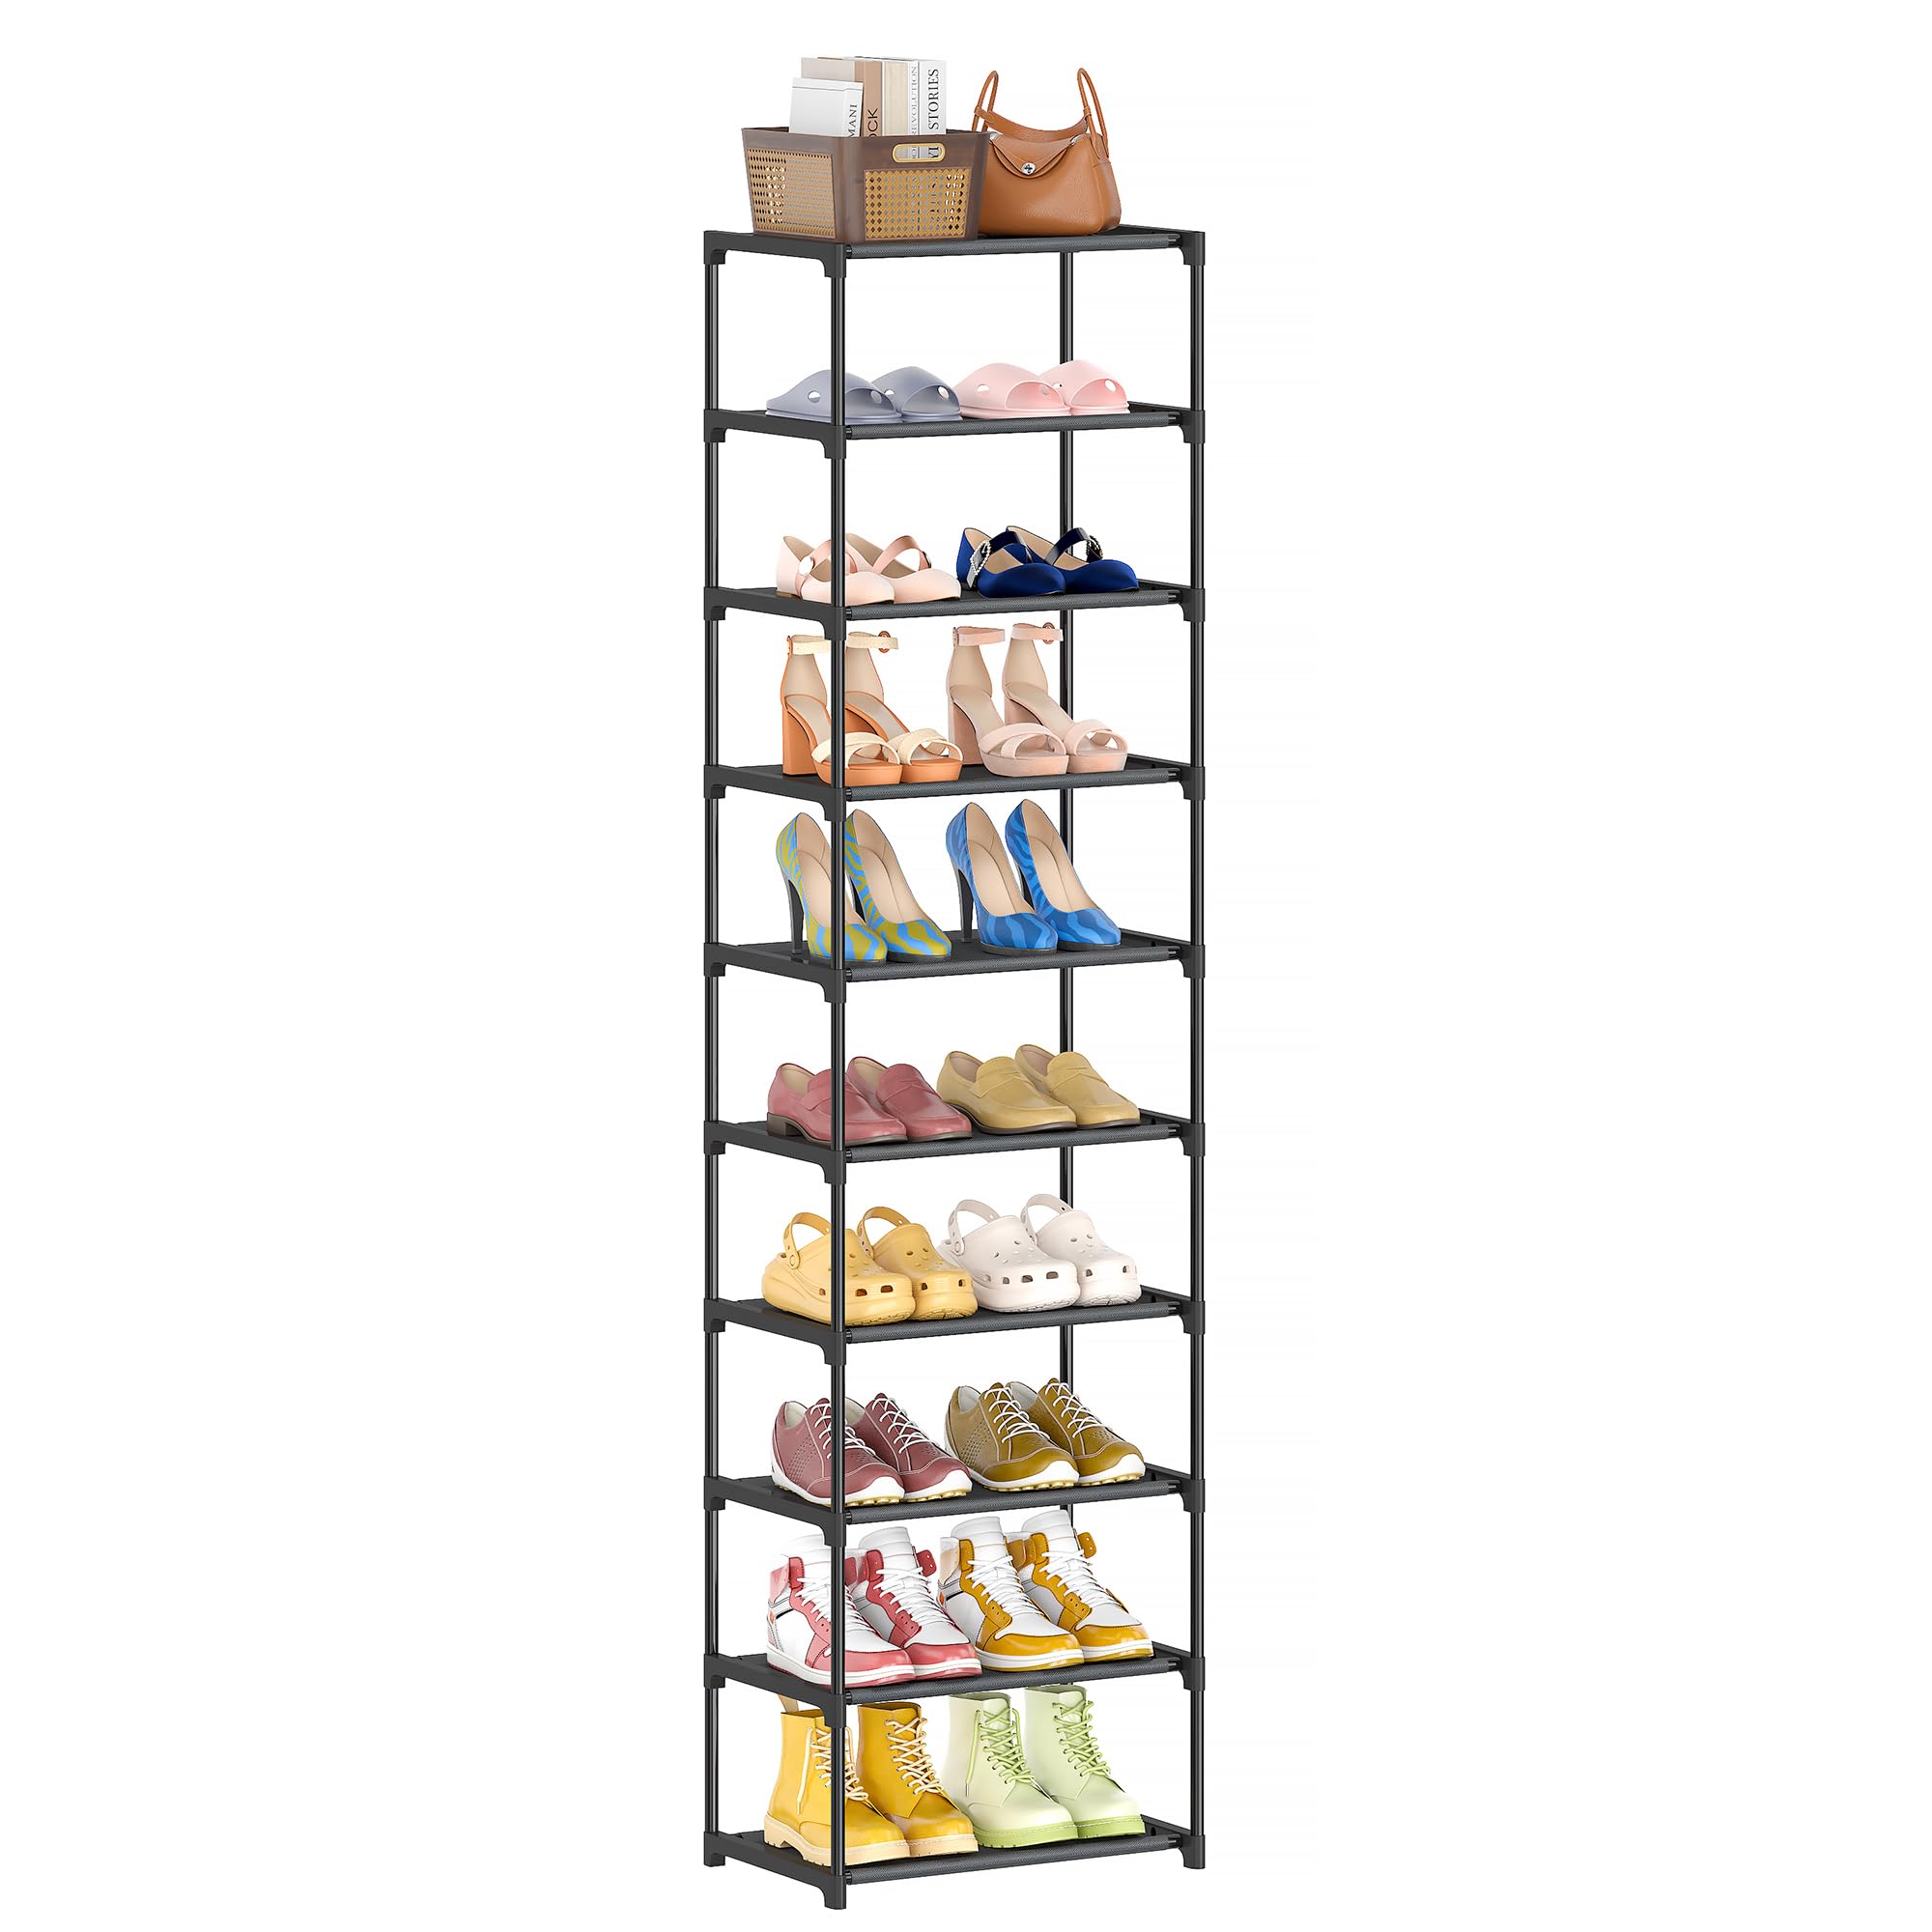
Autonomier 10 Tier Tall Shoe Rack, Non-Woven Fabrics Compact Narrow Shoe Stand Shelf, Vertical Small Space Saving Storage Organizer for Closet Floor, Front Door Entrance, Entryway, Black
Autonomier 10 Tier Tall Shoe Rack, Non-Woven Fabrics Compact Narrow Shoe Stand Shelf, Vertical Small Space Saving Storage Organizer for Closet Floor, Front Door Entrance, Entryway, Black
Item Details
Pickup Location
4031 Market Center Dr Suite 303
North Las Vegas, NV, 89030
Quality
Used
Functional
No Damage
Assembly Required
In Package
No Missing Parts
Auction closes
September 21, 2025 at 2:56 AM
brand
AutonomierEstimated Retail Price
$15.99
color
Blacksize
16.3 inches x 10.2 inches x 61.8 inchesBuyers Premium
15%
Inventory Number
1052051652
Features
- [Space Saving] Is your home cluttered with shoes everywhere? This 10-tier tall shoe rack might be able to help you. Its vertical design maximizes your floor space efficiency. Each tier can hold 2 pairs of shoes, but for extra-large men's shoes, you might only fit 3 lonely shoes per tier. Double-check the size: 16.3"X10.2"X61.8"
- [Flexible Assembly] You can assemble it as a 10-tier tower, split it into two 5-tier racks, or remove some shelves to fit tall boots or items of varying heights. You can customize the number of tiers on the shoe rack according to your needs
- [Sturdy Materials] Made with rust-resistant metal tubes, plastic connectors, and waterproof non-woven fabric. It can be easily wiped clean with a soft damp cloth. Its lightweight also makes it easy to move around, so you can reposition it anytime with ease
- [Versatile Usage] This slim skinny shoe storage organizer is suitable for kids, toddler, adults' sneakers flats slippers boots. It fits narrow spaces, like hallways, entryways, bedrooms, closet floors, front door entrance, entryway, living rooms, college dorms, apartment floor corners, garages etc
- [Tool-Free ] Just connect the metal tubes, non-woven fabrics and plastic connectors together according to the instructions or video! NOTE #1 Long tube should be installed in the side hole of the plastic part, just like the INSTALLATION GUIDE or web video shows. #2 Press the joints firmly during assembly to ensure a tight fit


Getting Started
Learn more about bidding, winning, pickup, and more on our video tutorials page.
Visit Video Tutorials